This is a two part series blogpost:
- Part 1: Setting up the logic app to retrieve text from an image
- Part 2: Pushing the detected text to a text file in blob storage (this)
In my previous blogpost, we created the logic app where we could upload a picture to a folder in OneDrive and Computer Vision API detected the text from that image. Please read through that post if you haven't already before continuing this one. Let's take it a bit further in this blogpost.
Save detected text to a text file
Currently, there is no action for 'Append' operation on blob storage. This is bit of a bummer if you ask me! So we need to write a bit of a code to achieve this. I know I said, I want this to be easy but such is life, you got to to write some code somewhere you didn't anticipate. I'm going to pick up the Azure Function with C#, you can use whatever language you are comfortable with.
Create Azure Function app
You can pick any IDE you prefer, I'm going to work with Visual Studio (VSCode is amazing as well, if you prefer that)
I won't go into detail of how create and publish functions as it has already been written about. You can follow this link to create Azure Functions and Publish them to Azure. If you prefer VS Code check this out.
- Once you have created the Functions project, Delete the 'Function1.cs' file and add a new Function (Right Click Project -> Add -> New azure function -> Select 'Azure Function' and name it AddQuotetoFile)
- Select 'Http trigger' and press 'OK'
Moving on to the actual code. Here are some details:
The Function expects the following payload (request)
{
    "blobName": "testfile.txt",
    "containerName": "ocr-images",
    "text": "Here is the quote from the book"
}
- blobName: the name of the blob that we need to append the text to (if it - doesn't exist already, it'll be created the first time)
- containerName: the blob storage container where the file should exist
- text: the actual text we want to write to the file
In this function, when it's triggered, we want to:
- Parse the HTTP request body
- Make sure we have all the information we need
- Grab reference to the blob container (create if it doesn't exist)
- Grab reference to the blob (create if it doesn't exist)
- Append the text at the end of the file
This is how my main function looks like. Please check out my GitHub repository for the entire solution.
public static class AddQuotetoFile
    {
        [FunctionName("AddQuotetoFile")]
        public static async Task<IActionResult> Run(
            [HttpTrigger(AuthorizationLevel.Function,"post", Route = null)] HttpRequest req,
            ILogger log)
        {
            log.LogInformation("C# HTTP trigger function processed a request.");

            // Expects JSON body:
            // {
            //      "blobName": "[Blob name here]",
            //      "containerName": "[Container name here]",
            //      "text": "\"Column A\","Column B\",\\n,\"A1\",\"B1\",\\n,\"A2\",\"B2\""
            // }

            var connectionString = System.Environment.GetEnvironmentVariable("StorageConnectionString");

            // StorageConnectionString configured as app setting.

            string requestBody = await new StreamReader(req.Body).ReadToEndAsync();
            dynamic data = JsonConvert.DeserializeObject(requestBody);

            var blobName = data?.blobName;
            var containerName = data?.containerName;
            var text = data?.text;

            if (blobName == null)
            {
                return new BadRequestObjectResult("blobName is required.");
            }

            if (containerName == null)
            {
                return new BadRequestObjectResult("containerName is required.");
            }

            if (text == null)
            {
                return new BadRequestObjectResult("text is required.");
            }

            var storageAccount = CloudStorageAccount.Parse(connectionString);
            var blobClient = storageAccount.CreateCloudBlobClient();
            CloudBlobContainer container = blobClient.GetContainerReference(containerName.ToString());

            await container.CreateIfNotExistsAsync();


            var appendBlob = container.GetAppendBlobReference(blobName.ToString());

            if ((await appendBlob.ExistsAsync()) == false)
            {
                await appendBlob.CreateOrReplaceAsync();
            }

            StringBuilder lineToAdd = new StringBuilder();
            lineToAdd.AppendLine(text.ToString());
            await appendBlob.AppendTextAsync(lineToAdd.ToString());

            return new OkResult();
        }
    }
Notice in the code snippet, we are referencing 'StorageConnectionString' environment variable. This is the connection string of a storage account where the file is being created/appended. For this, we need to create a storage account.
- Head over to the portal
- Create a resource for Storage Account

- Press 'Review + create' to create the account
- Head over to the resource once it's created
- Select 'Access keys' under Settings
- Copy the Key1 connection string
- Back to Visual Studio, open your 'local.settings.json' file and set a property 'StorageConnectionString' under Values
{
  "IsEncrypted": false,
  "Values": {
    "AzureWebJobsStorage": "UseDevelopmentStorage=true",
    "FUNCTIONS_WORKER_RUNTIME": "dotnet",
    "StorageConnectionString": "<your connection string goes here>"
  }
}
- Make sure the you can Build the function correctly.
At this point, if you want to test the function locally, hit F5 to debug the solution, you can make a HTTP request via Postman (or any other tools) to ensure the function is working as expected. Drop a file in a container in the storage account you created and construct the HTTP request and hit your local function endpoint (you can use simulator to pick the file from instead of using Storage Account in Azure, if you have it setup).
Once you have established the function works correctly, it's time to publish the function. We all know "Friends don't let friend right-click and publish" - but it's OK for this demonstration, so don't feel bad and go ahead - yes Right click the solution and hit Publish. Follow the links that I mentioned earlier (here and here) for the instructions on how to run locally and publish from Visual Studio and Visual Studio Code.
- Once the publishing is successful, we would like to add the application setting.
- Navigate to the Azure portal and open the function app resource that we just published
- Head over to 'Configuration' under Settings
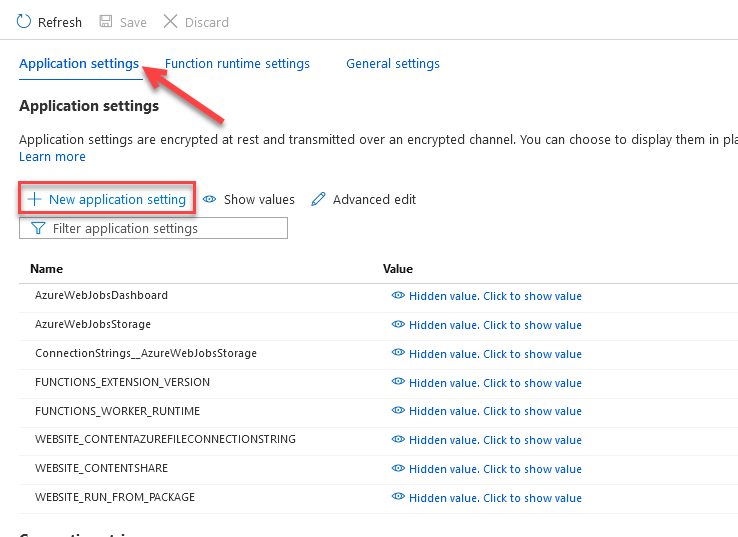
- Add a new application setting
- Name: StorageConnectionString
- Value: "the connection string of storage account you put in local.settings.json file earlier"
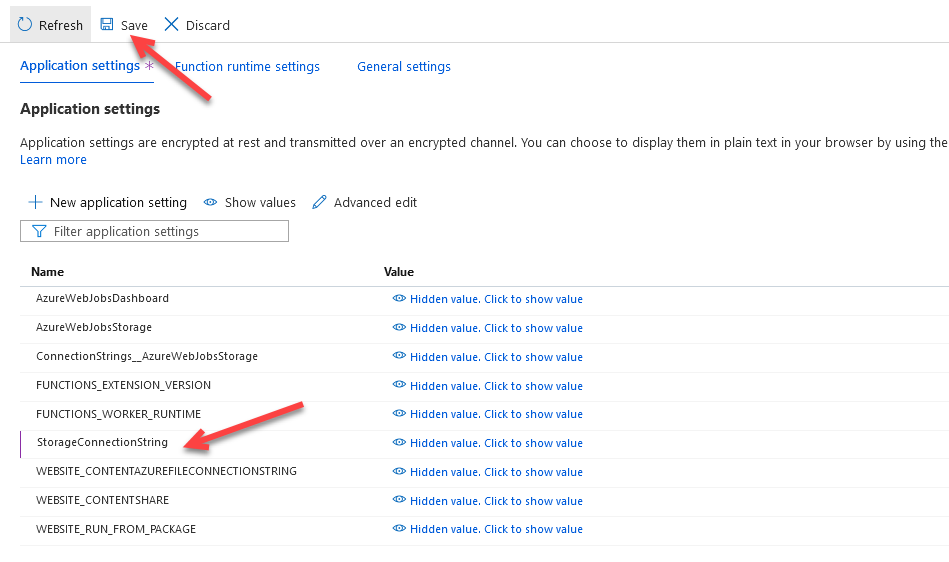
- Make sure to click save to persist the setting, otherwise you will loose it.
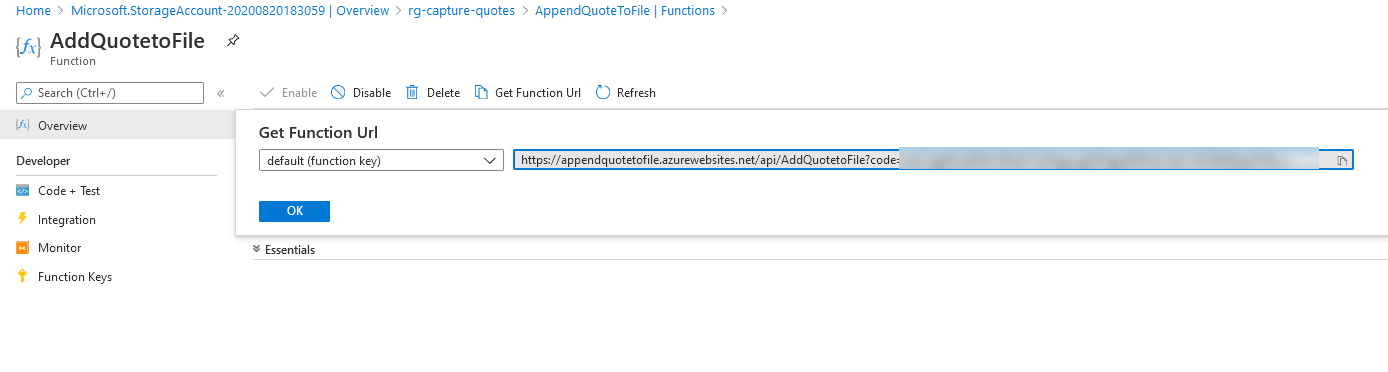
Now we are ready with the setup. You can test this at point via Postman as you did earlier. The only change would be to pick up the URL of the function from Azure instead of localhost. Still in your Function in the Portal -> Select 'Functions' -> Select your function ('AddQuotetoFile) -> click on 'Get Function Url' and copy the URL.
Update the logic app to trigger Azure Function
- Head over to the Azure Portal, Navigate to the Logic App we created in Part 1. Select 'Logic app designer' under 'Development tools'
- Click '+ New step' to add an action
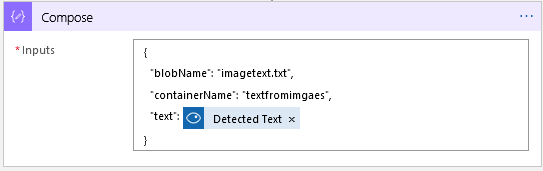
- Search 'Compose' -> Select 'Data Operations' and then 'Compose' action.
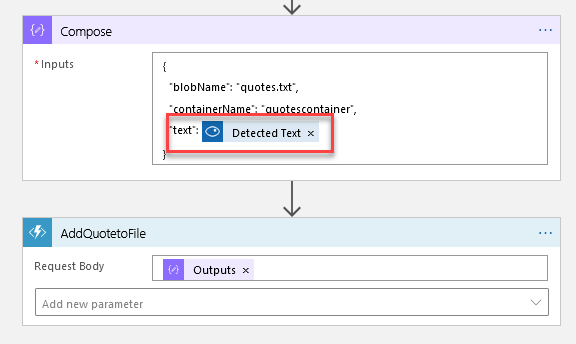
- Under Inputs, add this JSON
{
  "blobName": "quotes.txt",
  "containerName": "quotescontainer",
  "text": @{body('Optical_Character_Recognition_(OCR)_to_Text')?['text']}
}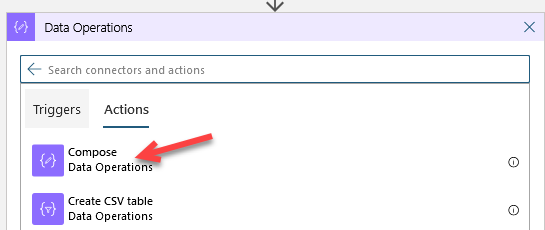
- Add another action
- Search for 'Azure Functions' -> Select 'Azure Functions' and then 'AppendQuoteToFile' action
- Set 'Request Body' to compose outputs
- Save the Logic App
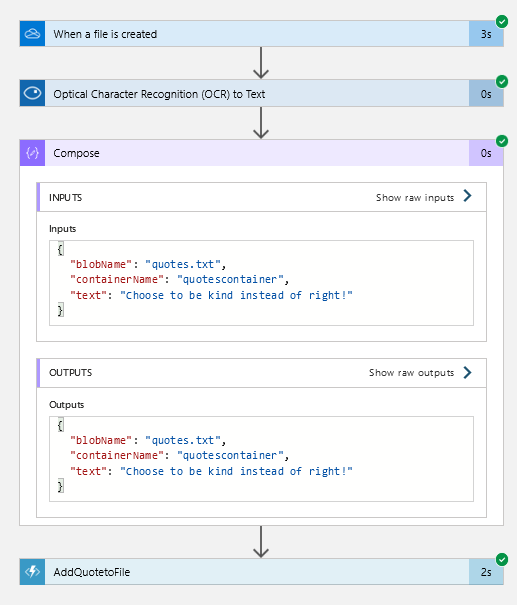
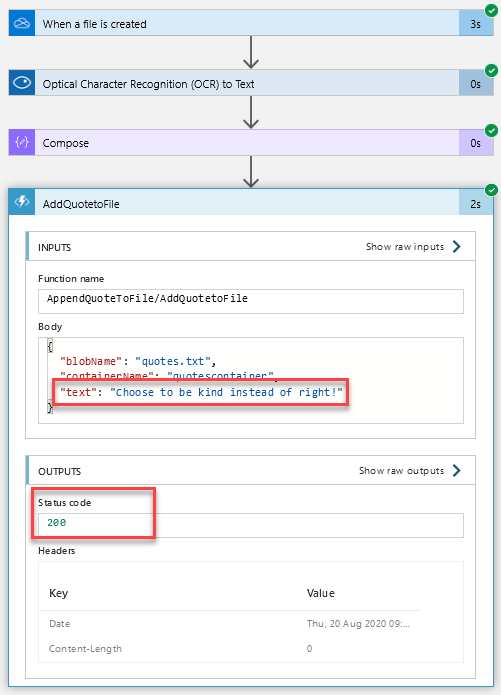
We are almost done, time to test it out now. Upload another image in your OneDrive folder 'ocr-images' and watch the run history again. Here is my successful run:
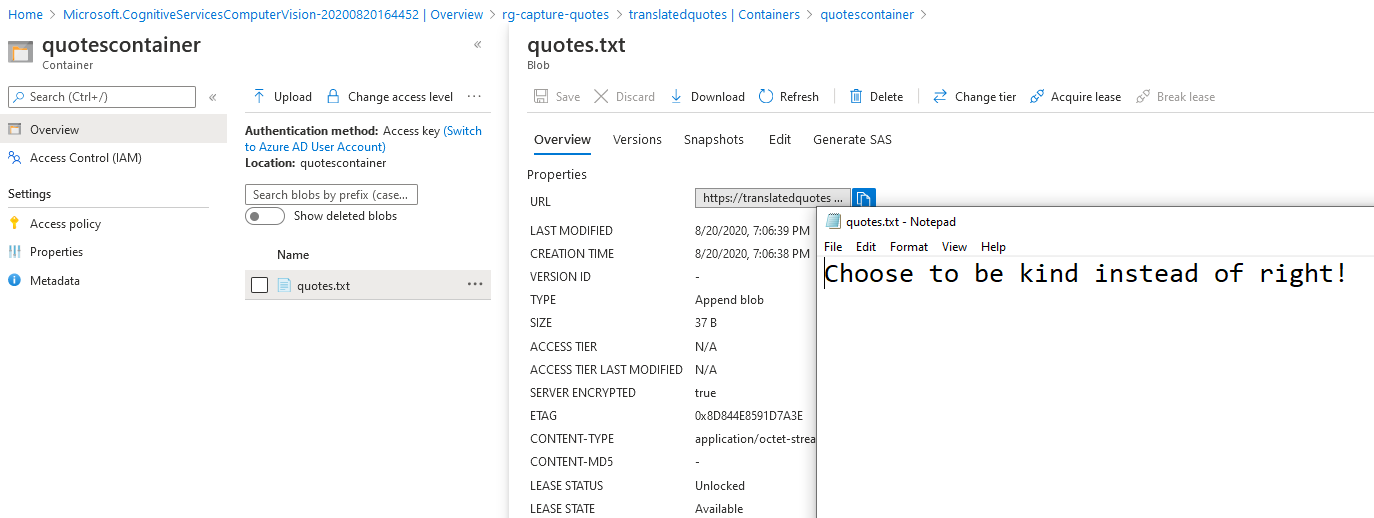
Let's open up the storage account to see if the text was written successfully.
- Select the storage account -> Containers -> quotescontainer
- click on the file 'quotes.txt' (notice the Blob type is 'Append blob')
- From the pop-up press 'Download' and open it in any editor and inspect the contents
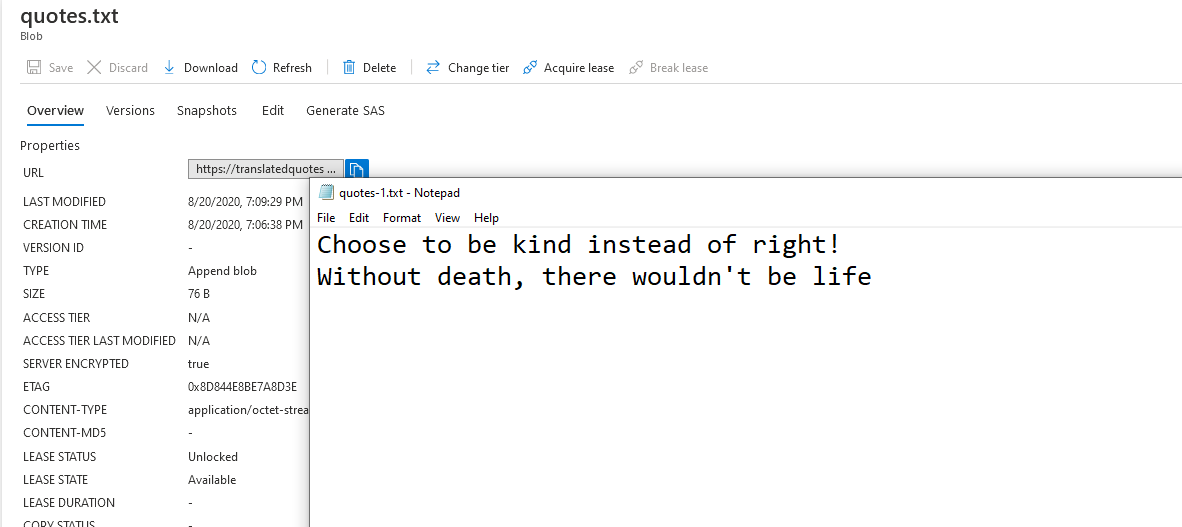
I uploaded yet another file in my OneDrive. Download the quotes.txt file again and look at the contents. You will see another line has been appended.
Here are all the resources we ended up creating for this solution

We are finally done! Now when you take a picture of any quote and upload it to your OneDrive, Logic app will be triggered and appends the quote into a text file in your blob storage.
In case you followed along and provisioned the resources and you don't intend to use the solution, you can delete the resource group here.
This turned out to be a much longer blogpost than I anticipated, so thanks for tagging along.
Let me know if you found this useful and if you have any suggestions to improve this further.
Cheers